Category: News

  • Streamlining Your Month-End Close Process

    Streamlining Your Month-End Close Process

    Small teams often find the month-end close exhausting. Long hours go into manual data entry and fixing reports under pressure. You need final numbers to measure performance, stay compliant, and make plans. When the procedure is inefficient, though, it eats up time and drags morale down.

    The close itself isn’t the problem. Most trouble comes from poor organization, hand-keying everything, and different people using different methods. The fix is straightforward: build a clear, repeatable process that cuts time and gives better information.

    A streamlined month-end close has direct benefits. You get financial data faster, so you can make decisions quickly. It reduces errors from manual work, making your financial records more accurate. 

    This efficiency gives you and your team more time to analyze information and plan, rather than just process it. Essentially, it turns a basic accounting task into a practical management tool.

    These are the things that speed up month-end close, drop the stress level, and make your numbers actually usable: key tasks, automation shortcuts, and quick wins. We go over the must-dos first, then piece together a process you can just repeat next month without starting from scratch.

    Essential Month-End Tasks for Small Businesses

    A reliable close requires a consistent and complete process. Completing these basic tasks correctly each month is necessary for accurate financial records.

    1. Reconciling Accounts

    This is the cornerstone of the close. Bank and credit card reconciliations verify that every transaction in your accounting software matches your actual bank statements. It catches errors, uncovers missing transactions, and is your first line of defense against fraud. 

    Don’t stop at the bank; also, reconcile key balance sheet accounts like accounts receivable (does your ledger match unpaid invoices?), accounts payable (does it match outstanding bills?), and payroll liabilities.

    2. Reviewing & Categorizing Income and Expenses

    Ensure all transactions for the month are recorded and assigned to the correct account. Review the profit and loss statement for any anomalies or mis-categorized items. This step guarantees your financial reports accurately reflect your business performance.

    3. Recording Adjusting Entries (Accruals & Prepayments)

    To follow accrual accounting, you must make adjusting entries. Accruals record expenses used and revenue earned in the period, regardless of billing. Prepayments adjust for items paid upfront, like insurance, by expensing only the share that belongs to the current month.

    4. Inventory Count & Valuation (if applicable)

    If you’ve got physical stock sitting around, you really need to do a proper count—or at least make damn sure your perpetual system is actually up to date. Then go fix the inventory asset number and COGS, so they line up with what’s really there.

    5. Fixed Assets & Depreciation

    Record any new capital purchases and post monthly depreciation/amortization expenses for all fixed assets. This systematically reduces their book value on the balance sheet.

    6. Generating & Analyzing Key Reports

    After reconciling and adjusting the books, generate these key reports:

    • Balance Sheet: Shows your financial position (Assets, Liabilities, Equity) at a point in time.
    • Income Statement (P&L): Details revenue and expenses to show profit or loss for the month.
    • Statement of Cash Flows: Tracks the sources and uses of cash, essential for managing liquidity.

    7. Review, Approval, and Finalization

    The owner or a senior manager has to do the final review. They look at the numbers and say it’s good. Then lock the period in the software. That means no more changes to that month. Keeps everything clean for audits and comparing old data later.

    Automating Repetitive Month-End Work

    Automation saves the most time and stops most errors during the month-end close. Put the repetitive tasks in software. That lets your team do better work—actual analysis, checking variances, planning ahead—instead of just data entry. If you plan it out, the close becomes a normal process you run, not this endless data chase.

    Use automated bank feeds that import transactions directly into your ledger (e.g., QuickBooks Online, Xero). Then, set up bank rules to automatically categorize recurring transactions. A monthly software subscription from the same vendor can be learned and coded correctly with zero manual effort.

    Setting Up Automatic Report Generation

    Stop running reports manually. It’s a huge time sink and a perfect candidate for automation. Most accounting platforms have this function built right in. You set it up once and forget it. The system does the work for you.

    First, lock in your templates. Customize and save your essential report formats—Profit & Loss, Balance Sheet, and key reconciliations. Get the date ranges, grouping, and layout exactly how you need them. This guarantees the reports look right every single month, with no last-minute tweaking.

    Then, just schedule it. Pick your date and time. A common trigger is the morning after your preliminary close. The software will execute on that schedule, pulling the period’s data and dropping it into your saved templates automatically.

    Once that’s done, you can configure the system to email the finalized PDFs directly to your stakeholders. The owner, the accountant, the department leads—they all get the same numbers at the same moment. This eliminates the manual request cycle and gets everyone analyzing the data faster. It’s a simple switch that makes the entire closing process feel more controlled.

    Exporting and Consolidating Data Efficiently

    A major time sink is pulling data from different systems into a single place for analysis. Automating this export is a game-changer.

    Instead of manual CSV exports, you can use dedicated, secure tools like QB to Google Sheets. This tool allows you to set up live, automatic syncs of your QuickBooks data (Transactions, P&L, Balance Sheet) directly into a Google Sheet.

    Once data is in Sheets, it acts as a self-updating source of truth. This allows you to build custom dashboards, perform analysis using pivot tables, and create visualizations without any manual exports. The consolidation of your month-end data happens automatically in the background.

    Use a cloud-based accounting system that connects to your other business tools, like your POS, invoicing, and payroll software. This creates a smooth flow of data and removes the need for manual double-entry. For example, when a sale is made in your POS, it will automatically record itself in your accounting ledger.

    Creating a Month-End Checklist

    A good month-end checklist is a practical tool. It creates a repeatable process to make sure every important task gets done. Without it, steps get missed and deadlines are forgotten.

    The checklist does three things. It lists what needs to be done, says who is responsible for each item, and sets clear deadlines.

    How to Build Your Checklist:

    1. Write down every single task. Turn the “Essential Tasks” list into clear steps anyone can follow (like “Reconcile business checking account”, “Go through uncategorized transactions”, “Enter monthly depreciation journal entry”).
    2. Put one person’s name next to each task. Only one owner per item—no shared responsibility.
    3. Give every task a firm deadline. Start from your target close date and work back (Day 3 of the new month, etc.). Slot tasks into specific days: T-3, T-2, T-1, Close Day.
    4. Add simple checks for proof. Include boxes to mark “File attached” or “Reviewer approved”.
    5. Keep it in one shared spot. Use Asana, ClickUp, Trello, or even a Google Doc that everyone can open and edit.

    You need a clear timeline to make your checklist work. This framework spreads the close over several days, from preparation to finalization.

    Start a few days before the month-end. Send reminders for final expense reports and timesheets to ensure all costs are captured. Also, begin reviewing your Accounts Receivable and Accounts Payable to see which invoices and bills are still open. This early look helps spot issues before the formal close.

    On Close Day 1, focus on verification. Reconcile all bank and credit card accounts. Then, book any necessary adjusting entries, like accruals for incurred expenses or adjustments for prepaid items. This locks down your core numbers.

    Close Day 2 is for review. Run a preliminary Profit & Loss statement and Balance Sheet. Scrutinize them for errors, unusual items, or significant variances from the previous month. Correct any issues you find.

    On the Final Day, management conducts a last review and signs off. Once approved, lock the accounting period in your software to prevent changes. Finally, distribute the official financial reports to all stakeholders.

    Tips for a Faster Month-End Close

    A faster, lower-stress month-end close depends on consistent habits and an efficient workflow. Spreading tasks out, using clear systems, and managing the process early reduces time and improves accuracy.

    Distribute the Workload Weekly

    Do not delay reconciliation into one large session. Reconcile bank and credit card accounts weekly to break the work into short 15–20 minute reviews. This makes errors easier to spot and simplifies the month-end close.

    Systematize with a Close Playbook

    Relying on memory is unreliable. Create a written “Close Playbook.”

    • Document reconciliations: Step-by-step instructions for each account.
    • Standardize entries: List exact accounts for recurring items like depreciation.
    • Organize files: Specify where and how to save supporting documents.

    This playbook keeps the process consistent, simplifies training, and supports continuity when someone is absent.

    Enforce Internal Deadlines

    Your finance team needs all data to close the books. Set and enforce company-wide deadlines for submitting invoices, expenses, and sales reports. This stops the last-minute chase for information and lets accounting work without interruption.

    Conduct a Mid-Month Review

    Find problems early. Around the 15th, run a quick profit and loss report. Check key accounts for anything unusual. This catches errors, like a misapplied payment or wrong expense category, with time to fix them before month-end.

    Consult Your Accountant on Workflow

    Your accountant sees the results of your closing process. Ask them to look at the process itself, not just the final reports. They can spot repeated problems, suggest software tools you are not using fully, or recommend apps that can replace manual work. Their outside view can find fixes you might miss.

    Refine the Process Each Month

    After the close, hold a brief team meeting to review what worked and what caused delays. Document the findings and update the closing checklist. Repeating this each month improves speed and reliability over time.

    Conclusion

    Fixing your month-end close is one of the fastest ways to stop wasting time in the business. Forget staying late — focus on doing it smarter. Get basic routines in place, automate the repetitive tasks, and make sure the same steps happen every single month.

    First, organize required tasks so they are completed correctly and without unnecessary issues. Next, identify any steps still done manually and replace them with automated processes, such as scheduled data syncing or automated report generation. Maintain a short checklist to ensure no steps are missed. Periodically review the process and remove steps that continue to slow things down.

    You’ll get clean numbers quicker, decisions stop being stressful, the team doesn’t burn out, and people actually trust the reports. Start with almost nothing — write a checklist this week or automate one feed next week. Each thing you fix shortens the whole process and makes it useful instead of just something you survive.


  • Best Visual Studio SQL Formatter Plugins

    Best Visual Studio SQL Formatter Plugins

    Maintaining standardized SQL formatting in Visual Studio is essential for team productivity and code sustainability. The IDE’s native SQL support, however, offers only basic formatting options, resulting in variable styles across files, extended code review times, and added complexity during debugging.

    Dedicated extensions overcome this constraint by integrating reliable, automated formatting—ensuring consistent indentation, casing, and layout directly in the development environment.

    1. SQL Complete

    SQL Complete by Devart is a full-featured SQL development tool for users of Visual Studio and SSMS, going well beyond standard formatting. 

    Installed as an extension, it adds intelligent code completion, immediate syntax validation, refactoring support, on-the-fly analysis, and customizable formatting rules that enforce team-specific standards directly in the editor.

    Key Formatting & Automation Features:

    • Switchable profiles (Default, Collapsed, Extended, etc.) with custom/shareable team configurations.
    • Auto-syncs identifier case to the database; customizable dictionary for proper CamelCase recognition.
    • Auto-formatting on type/paste/command; bulk processing of files/folders with Formatter Wizard.
    • Protect code blocks using –noformat and –endnoformat tags.
    • Standalone CLI for pre-commit hooks, CI/CD pipelines, and enforced formatting standards.

    Beyond formatting, this Visual Studio SQL formatter speeds up SQL development with context-aware completion, automatic JOIN generation, instant object information, and built-in snippets. It adds code safety and navigation through invalid object detection and SSMS tab coloring.

    The tool earns consistent high ratings and industry awards for reliability. Widely used by SQL Server teams in large organizations, it integrates as an add-in for Visual Studio and SSMS, providing automation, standardization, and intelligence beyond native features.

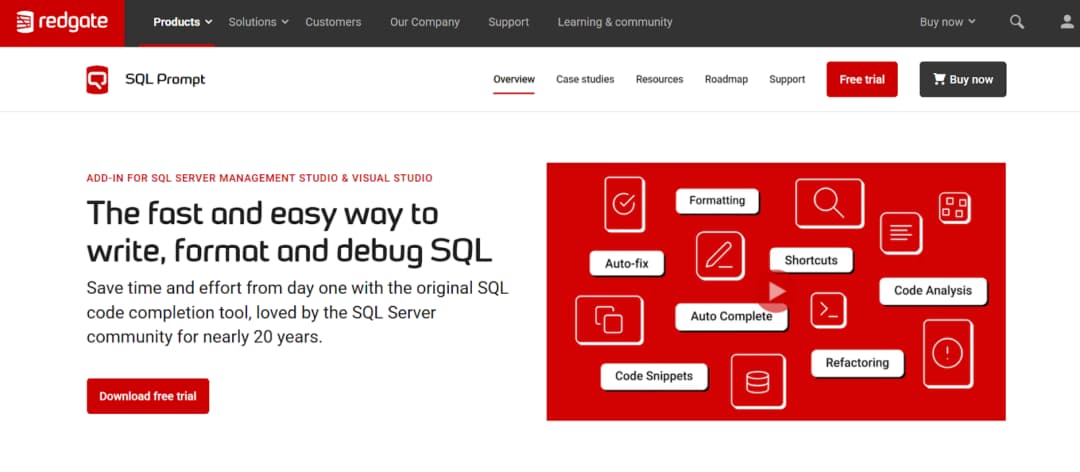
    2. Redgate SQL Prompt

    Redgate SQL Prompt from Redgate Software is an add-in for SQL Server Management Studio and Microsoft Visual Studio that combines SQL formatting with intelligent, day-to-day coding assistance. In practice, it sits inside the editor and continuously supports writing, fixing, restructuring, and standardizing SQL without breaking the workflow.

    Key Formatting & Automation Features:

    • Instant formatting with keyboard shortcut or bulk reformat using shareable profiles.
    • Predefined styles (Default, Collapsed, Indented, etc.) plus full control over indentation, alignment, casing, and layout.
    • Context-aware IntelliSense for object/clause suggestions and snippet expansion.
    • Real-time analysis detects issues; refactoring tools rename objects and restructure queries safely.
    • Built-in AI assistance generates, edits, or explains SQL from natural-language prompts in SSMS.

    In addition to formatting, SQL Prompt includes searchable query history, context-based tab coloring in SSMS, and auto-correction of frequent issues. It works across on-premises and cloud SQL Server environments, including Azure SQL, Amazon RDS, and Google Cloud SQL.

    Within Visual Studio, it combines formatting, code analysis, refactoring, snippets, history, and AI support into a unified experience. This enables uninterrupted SQL development with automatic standardization, proactive error prevention, and improved efficiency.

    3. SQLinForm SQL Formatter 

    SQLinForm by Gu is a dedicated SQL formatter. It converts raw SQL into clean, consistent, and readable code. The tool works across multiple editors and environments.

    It is available as extensions for Microsoft Visual Studio, SQL Server Management Studio, VS Code, Notepad++, JetBrains IDEs, DBeaver, and also as a Windows desktop application and free online formatter. This makes it easy to keep the same formatting behavior regardless of where SQL is written.

    Key Formatting & Automation Features:

    • Multi-IDE compatibility: extensions for VS, SSMS, VS Code, Notepad++, desktop app, and web-based tool.
    • Custom profiles with 150+ controls over indentation, alignment, casing, spacing, and clause breaks.
    • Parses and formats partial or invalid SQL, helping identify issues.
    • Wide database support: SQL Server, Oracle, PostgreSQL, MySQL, Snowflake, BigQuery, and more.
    • Processes embedded SQL within C#, Java, Python, and PHP application code.

    SQLinForm supports standardized formatting via profiles. The Pro version provides comprehensive controls with live previews for precise, team-wide style enforcement.

    Free and Pro editions place no limits on SQL size or usage. A single Pro license permits use on several devices.

    As a specialized beautifier, it ensures high readability, structural consistency, and adherence to standards. For organizations requiring uniform, well-organized SQL independent of IDE or writer, it offers an effective solution.

    4. Poor Man’s T-SQL Formatter

    Poor Man’s T-SQL Formatter, created by Tao Klerks, is a long-standing open-source project focused on one goal: instantly turning messy T-SQL into readable, structured code without cost, licensing barriers, or setup friction. 

    It can be used directly online at poorsql.com, works offline in the browser, and is also available as plugins for SQL Server Management Studio and Microsoft Visual Studio, a command-line bulk formatter, and even a WinMerge plugin for formatting during file comparisons.

    Key Formatting & Automation Features:

    • Lightweight VS Code integration — format-on-save and native commands.
    • Broad dialect coverage: T-SQL, PostgreSQL, MySQL, Snowflake, BigQuery, Spark, others.
    • Fully configurable: keyword case, operator line breaks, comma position, line width, alias alignment, indentation.
    • Focused on speed — reliable, fast beautification without unnecessary features.

    PoorSQL features live preview and tolerance for imperfect input. Enter code, modify options instantly, reformat while keeping comments, and apply quick casing rules.

    Its lightweight design enables command-line batch processing, automated hooks, and standardized presentation before merges.

    Limited to formatting, it delivers accurate, customizable results anywhere needed. For teams wanting a free, programmable method to maintain SQL consistency across environments, PoorSQL offers a straightforward solution.

    5. Prettier SQL / SQL Formatter (VS Code)

    Prettier SQL VSCode is a free extension for Visual Studio Code that brings SQL formatting capabilities directly into the editor using the popular sql-formatter library. With millions of installs, the extension focuses solely on turning plain SQL text into clean, well-structured queries that are easier to read and maintain.

    Key Formatting & Automation Features:

    • Native VS Code extension with format-on-save and standard format commands.
    • Supports wide range of dialects: T-SQL, PostgreSQL, MySQL, Snowflake, BigQuery, Spark, and more.
    • Customizable rules for keyword casing, line breaks, commas, line length, alias alignment, and indentation.
    • Fast, lightweight formatting — quick cleanup via shortcut or on save, no extra IDE overhead.

    Once installed, Prettier SQL VSCode formats .sql files using configurable rules for consistent spacing, indentation, and keyword placement—without external tools.

    Unlike larger add-ins, it focuses solely on formatting and integrates with VS Code’s format-on-save and commands for instant organization, supporting uniform style and maintenance.

    It provides reliable, low-overhead SQL standardization directly in the editor.

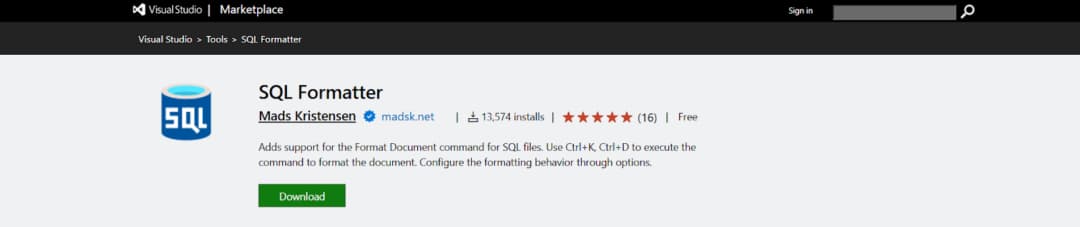
    6. SQL Formatter by Mads Kristensen

    SQL Formatter by Mads Kristensen is a free, lightweight extension for Microsoft Visual Studio that adds native SQL formatting support into the IDE. Unlike larger coding assistants, this extension focuses on the core task of transforming T-SQL code into a clean, consistent, and readable layout directly within the editor.

    Key Formatting & Automation Features:

    • Native Visual Studio integration — uses built-in Format Document (Ctrl+K, Ctrl+D).
    • .editorconfig support for shared, version-controlled team formatting rules.
    • Powered by Microsoft’s SqlScriptDOM parser for accurate T-SQL handling.
    • Tooltips on hover show keyword documentation and current formatting examples.
    • Formats SQL embedded in C# / .NET strings, not just standalone .sql files.

    The extension works with Visual Studio’s built-in Format Document command and shortcuts to apply uniform indentation, keyword casing, alignment, and logical structure to SQL. 

    Standards are defined once in configuration files alongside the codebase for consistent application across the team.

    Being free and purpose-built, it offers simple, reliable formatting for both standalone SQL and embedded strings, reducing manual effort and improving code maintainability in Visual Studio.

    Conclusion

    Embedding a SQL formatter in Visual Studio applies uniform standards at the point of code creation.

    A suitable extension eliminates manual cleanup, minimizes stylistic disagreements, and makes scripts clearer immediately. Available tools—ranging from comprehensive assistants to dedicated formatters—incorporate consistency into the workflow, supporting higher-quality and more team-friendly code.

  • How to Choose the Right AI Tool for Restoring Old Photos

    How to Choose the Right AI Tool for Restoring Old Photos

    Old photographs deteriorate in specific ways. Scratches, fading, and lost detail are distinct technical problems. Different AI tools are built to address these different problems. No single service corrects every type of damage. This selection is a functional guide matching defect types to algorithmic solutions. It is not a ranking of overall quality. 

    The correct tool depends entirely on the primary damage found in your specific image. Choosing based on this principle yields more predictable, technically sound results.

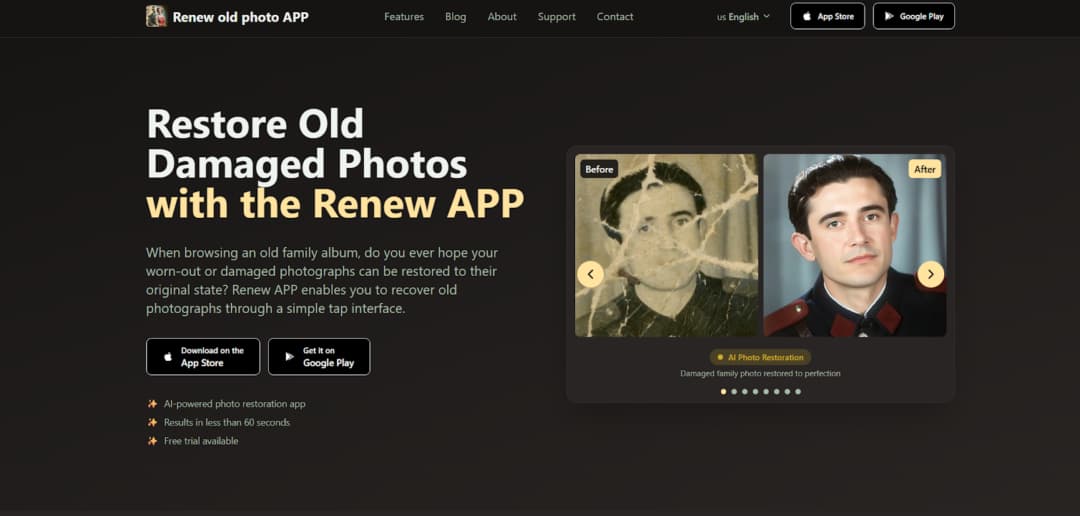
    1. Renew Photo

    Renew Photo operates an automated, multi-step restoration pipeline. It is designed to process photos with several simultaneous defects in a single workflow. The tool sequentially addresses issues like scratches, color loss, and low detail. This makes it suitable for complex cases where damage types overlap and interact. The process requires minimal user input from start to finish.

    Best Use Scenarios

    This service is for compound deterioration. It handles photos where multiple flaws like heavy fading, deep scratches, and lost detail coexist. These cases overwhelm simpler, single-function tools. The integrated pipeline coordinates corrections that might conflict if applied separately. Renew Photo works best in situations such as:

    • Photos with multiple overlapping defects;
    • Images with severe fading and contrast loss;
    • Old portraits needing detail reconstruction;
    • Black-and-white photos that require colorization.

    It is an automated system. You exchange granular manual control for a complete, hands-off restoration cycle.

    2. RetroFix

    RetroFix is a mobile application built for speed and convenience. It quickly improves image clarity and handles minor, superficial imperfections. The tool uses streamlined algorithms optimized for smartphone processing. This design prioritizes immediate results and ease of use over deep, archival restoration work.

    Best Use Scenarios

    This app fits common, minor photo issues from personal archives. It is for when you need a clearer version fast, not a perfect, historically accurate reconstruction. RetroFix is most effective for cases like:

    • Slightly blurred portraits;
    • Minor scratches and dust spots;
    • Faded prints needing sharpness improvement;
    • Quick mobile restoration without editing skills.

    Its utility drops off sharply with severe physical damage like large tears or major staining. It just isn’t built for that.

    3. Fotor AI

    Fotor AI Photo Restoration is a browser-based utility for standard photo correction. It provides essential AI-driven cleanup and enhancement through a web interface. The service performs generalized improvements to color, contrast, and clarity. This approach offers accessibility for users needing a straightforward online fix without software downloads.

    Best Use Scenarios

    This tool addresses predictable, moderate deterioration. It works on photos with common aging effects where a broad, overall correction is sufficient. Fotor performs well in situations such as:

    • Restoring moderately faded photos;
    • Improving contrast and color balance;
    • Enhancing clarity in scanned prints;
    • Quick browser-based correction without advanced controls.

    Precision control over specific damage areas is limited. The tool applies a uniform correction model to the entire image.

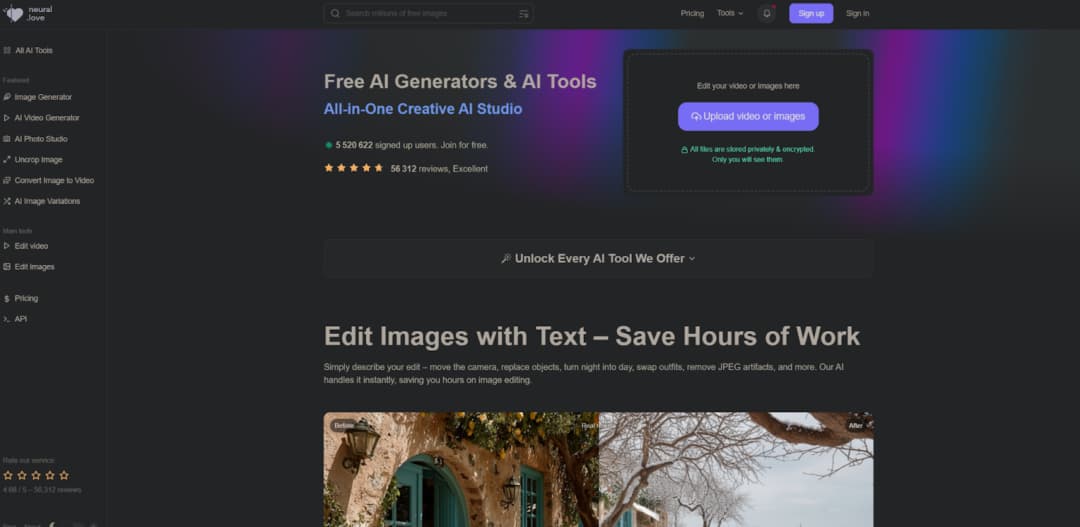
    4. Neural.love

    Neural.love Photo Restoration focuses on digital enhancement and noise reduction. It aims to improve perceived image quality by reconstructing detail and reducing visual artifacts. The service often incorporates colorization. Its strength lies in refining the digital signal, not repairing physical photograph damage.

    Best Use Scenarios

    Use this tool for digital degradation issues in scanned images. It targets problems introduced or worsened by the digitization process itself. Neural.love works best in scenarios such as:

    • Enhancing low-resolution scanned photos;
    • Reducing visible noise and compression artifacts;
    • Improving the overall sharpness of aged prints;
    • Colorizing black-and-white images.

    It is more of an enhancement engine than a physical restoration service. Don’t expect it to convincingly mend a torn corner.

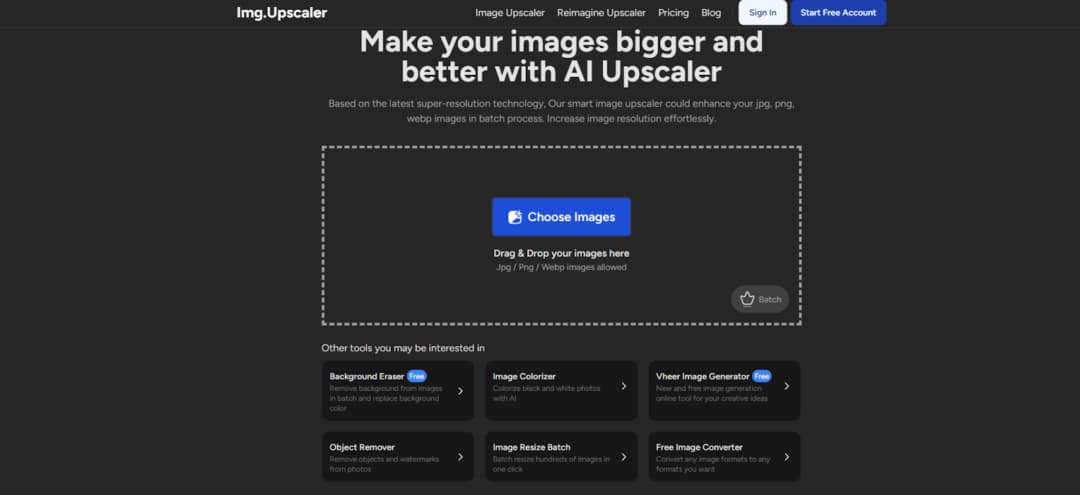
    5. Imgupscaler

    Imgupscaler Old Photo Restoration is a simple online tool for resolution enhancement and basic cleanup. It increases image pixel dimensions while applying light corrective filters. The process happens in a browser without registration. It is a one-step solution for improving the fundamental legibility of a low-quality scan.

    Best Use Scenarios

    This service is for technically poor source files. It is a practical first attempt when the main issue is a small, blurry, or pixelated digital file. Imgupscaler is most suitable for situations like:

    • Enhancing low-resolution images;
    • Improving the sharpness of blurred scans;
    • Light restoration of faded photos;
    • Quick online fixes without software installation.

    The tool is not designed to handle serious physical defects such as scratches or tears.

    6. Nero AI

    Nero AI Photo Restoration is an automated service for general photo cleaning and color adjustment. It applies a set of corrections to remove minor flaws and improve tonal balance. The process requires one click. It is built for casual users seeking an instant, acceptable improvement with zero technical effort.

    Best Use Scenarios

    This tool fits the need for a fast, automatic polish on photos with light, common aging signs. It standardizes a simple correction path. Nero AI is effective in situations such as:

    • Removing light scratches and dust;
    • Improving color balance in aged photos;
    • Enhancing overall clarity;
    • Fast automatic correction for casual users.

    The system offers limited parameter control. You accept its standardized output or seek another tool.

    How to Match a Tool to Your Photo’s Damage

    Tool selection is a diagnostic exercise. You must first identify the dominant form of damage in your photograph. A tool specialized for color fading will fail on a photo shredded by deep scratches. The algorithm’s design dictates its suitable applications. Misalignment here is the primary cause of disappointing results. When selecting an AI restoration tool, focus on the dominant type of damage:

    • Severe structural damage requires multi-step restoration tools.
    • Light blur and dust can be handled by mobile or browser tools.
    • Facial detail loss calls for portrait-focused enhancers.
    • Color fading benefits from dedicated colorization features.

    Using a general-purpose cleaner like Nero AI on a complex, multi-damage photo will yield a weak, incomplete fix. The tool lacks procedural depth. Conversely, using a heavy pipeline like Renew Photo on a simple, slightly blurry portrait is overkill and may unnecessarily alter original textures. Match the problem’s complexity to the tool’s specialized function.

    Final Practical Takeaway

    Each tool serves a defined purpose. Renew Photo for complex, layered damage. RetroFix for mobile convenience on minor issues. Fotor and Nero AI for standardized online corrections. Neural.love and Imgupscaler for digital file enhancement. Their functions are complementary, not competitive.

    The final output quality is irrevocably tied to the input scan quality. A high-resolution, well-lit scan provides the algorithm with sufficient data to work. A poor scan guarantees a limited result, regardless of the tool’s sophistication.

    Select based on a clear assessment of your photograph’s primary deterioration. Consider the required level of control and the desired outcome. This methodical, damage-first approach removes guesswork and leads to more technically reliable restoration attempts.

  • Why White Label Link Services Only Work When You Own the Process

    Why White Label Link Services Only Work When You Own the Process

    White label link-building services can seem like a godsend when your agency has so many tasks to handle. The concept is simple: someone else does all the work for you, and you get the results. Sounds like a win-win, right?

    But here’s the catch — white label link building only works when you control it. If you just hand it over to someone else without keeping a close eye on how it’s going, things can go awry very quickly. From irrelevant backlinks to weak content, there are many ways things can go wrong. 

    In this article, we’ll dig into what makes white label link building appealing, where exactly it can go wrong, and — most importantly — how to own the process so your clients get quality results every time. 

    The Appeal of White Label Link Building

    Let’s be honest, scaling SEO isn’t an easy task. One month you might have five client campaigns, and the next, twice as many. How do you handle it? You can hire in-house specialists, but it will take time and money. Plus, you’ll have to invest even more in training. That’s where white label link building services step in. 

    Scale Without the Overhead

    When demand grows, a white label link building solution offers a ready-made way to scale. You can take on as many clients as you want without needing to expand your internal team or build out infrastructure. It’s like adding more horsepower to your engine without rebuilding the car.

    A good white label link building company already has a network of partners and webmasters who they’ve been working for, allowing them to do manual outreach quickly and efficiently. That means you can work with more businesses and deliver consistent results without breaking a sweat. 

    Faster Delivery for Your Clients

    Deadlines are often the key factor ruining relationships with clients. Nobody wants to wait, and if you can’t deliver good links quickly enough, they may want to look into hiring another agency. With white label providers, you’re not going to hit this wall. Since a white label link service agency’s only job is to get links, your delivery speed is always going to be on top. 

    Clients get what they want — fast, and you get to look like a rockstar. 

    Where Things Go Wrong Without Oversight

    The flip side of handing off work is losing sight of what’s being delivered. And that’s where many agencies get burned.

    Mismatched Links and Niches

    One of the biggest risks in using white label link building services is link irrelevance. Maybe your client is in cybersecurity, but the provider lands a backlink on a DIY lifestyle blog. Sure, it’s a link — but it’s not the right one.

    Search engines see it. And so do clients, especially if they’re savvy. Irrelevant or low-authority links can damage your reputation and undo months of SEO work.

    Poor Communication and Reporting Gaps

    Without clear oversight, communication tends to fall through the cracks. Maybe your provider doesn’t tell you which sites they’re targeting. Or worse — they send you a monthly spreadsheet without any explanation, just a list of URLs.

    That leaves you in a tricky situation when your client starts asking questions. If you don’t know what was done, when, or why, you look unprofessional, even though you weren’t the one doing the actual work.

    What “Owning the Process” Actually Means

    White label doesn’t mean hands-off. The best agencies treat their white label link building company like an extension of their team, not a third-party vendor. If you want this model to work, you need to own the process from start to finish.

    Here’s how.

    Pre-Approving Links Before Placement

    Don’t let your provider decide where your links go without checking in first. Create a list of approved niches, domains, or even specific sites. Ask to see the link opportunities ahead of time.

    This way, you make sure every backlink fits your client’s brand, audience, and goals, and protect yourself from any awkward surprises.

    Reviewing Content Quality

    A killer backlink means nothing if the content surrounding it is fluff. Or worse — embedded in a bad copy full of typos, misspellings, and AI-sounding nonsense.

    Ask to review the content before it goes live. If that’s not possible, at least set clear content standards. Good white label link building solutions will be happy to comply if they are interested in long-term partnerships.

    Setting Expectations with Your Provider

    Let your provider know exactly what you expect — whether it’s DR minimums, traffic thresholds, link types (guest post, niche edits, etc.), or turnaround times.

    Clear guidelines from day one avoid back-and-forths and late-night headaches. Don’t assume they know your standards. Spell them out.

    Building a Workflow That Works

    Once you’ve decided to own the process, the next step is setting up a workflow that’s both tight and flexible.

    Start by building a shared tracking system — a Google Sheet, a project board, whatever works for you. This should include:

    • Sites being pitched;
    • Content topics;
    • DR/DA and traffic data;
    • Status of each link;
    • Client-specific notes.

    Assign someone on your team to act as the point of contact. They should check in weekly (or even daily, depending on volume) with your provider, review progress, and notify you right away if anything goes wrong. 

    Also, be proactive with client updates. Instead of waiting for them to ask what’s happening, send brief but consistent reports. Focus on value: which links were built, how they support ranking goals, and what’s next.

    This level of visibility keeps everyone in the loop and shows clients you’re taking care of them and doing your job like a pro.

    Final Words

    White label link building services can absolutely work — they just don’t work by themselves.

    Treating a provider like a “set it and forget it” machine is a fast track to bad links, unhappy clients, and even Google penalties. But when you own the process, review link targets, ensure content quality, and stay in close touch with your provider, white label becomes a powerful way to scale.

    It’s not about doing everything yourself. It’s about leading the charge. Whether you’re using a white label link building solution to boost volume or fill in skill gaps, success depends on your involvement.

    So if you’re thinking of partnering with a white label link building company, ask yourself this: are you ready to guide the process? Because when you do, that’s when the magic happens.

  • The Most Popular Libraries for FHIR Integration in Healthcare Systems

    The Most Popular Libraries for FHIR Integration in Healthcare Systems

    In today’s fast-evolving healthcare landscape, interoperability has become critical for improving patient outcomes, ensuring data fluidity, and fostering collaboration across healthcare systems. FHIR (Fast Healthcare Interoperability Resources) has emerged as a standard for exchanging healthcare information electronically. It provides a uniform framework for data interoperability that allows healthcare systems to communicate effectively, minimizing errors and delays.

    To ensure seamless FHIR integration in healthcare systems, developers rely on several popular libraries. These libraries offer the tools and APIs necessary to interact with FHIR resources, validate FHIR profiles, and create applications that can communicate with Electronic Health Records (EHR) and other healthcare data systems.

    This article will explore the most popular libraries used for FHIR integration in healthcare, such as the Kodjin, focusing on their features, benefits, and use cases. If you’re looking for the right tools to develop a FHIR-compliant healthcare system, this guide will provide valuable insights.

    Table of Contents

    1. What is FHIR, and Why is it Essential?
    2. Key Benefits of FHIR Libraries in Healthcare Systems
    3. Top Libraries for FHIR Integration
      • HAPI FHIR
      • Firely .NET SDK
      • Java FHIR Client by IBM
      • SMART on FHIR
      • Google FHIR Protocol Buffers
      • Kodjin FHIR Server SDK
      • Cerner FHIR Tools
      • Mirth Connect
      • Redox Engine
      • Simplifier.NET
    4. Factors to Consider When Choosing a FHIR Library
    5. Conclusion
    6. FAQs

    1. What is FHIR, and Why is it Essential?

    FHIR (Fast Healthcare Interoperability Resources) is an open standard developed by HL7 designed to enable the exchange of healthcare information through web-based technologies. FHIR simplifies healthcare data sharing by utilizing a modular format known as “resources,” which represent discrete pieces of healthcare information like patients, medications, diagnostics, and observations.

    FHIR’s primary goal is to make it easier for healthcare systems to exchange and understand data, ensuring smoother interoperability. Given the growing demand for integrated and real-time healthcare information, FHIR has become essential for healthcare providers, EHR vendors, and healthcare application developers.

    2. Key Benefits of FHIR Libraries in Healthcare Systems

    Integrating FHIR into a healthcare system can provide multiple benefits:

    • Interoperability: Ensures seamless communication between disparate healthcare systems, regardless of the vendor.
    • Scalability: Supports complex systems with large amounts of data and multiple endpoints.
    • Standardization: Provides a consistent format for exchanging healthcare data.
    • Flexibility: With a modular design, FHIR resources can be combined to suit a variety of needs.
    • Compliance: Helps healthcare organizations comply with regulations such as HIPAA, ensuring data privacy and security.

    Given these advantages, it’s no wonder that FHIR has become a standard for healthcare interoperability worldwide. To implement FHIR into their systems, healthcare developers rely on libraries that simplify the integration and development processes.

    3. Top Libraries for FHIR Integration

    Several libraries have emerged to help developers efficiently integrate FHIR into healthcare systems. Here are the top 10 most popular libraries for FHIR integration in 2024:

    1. HAPI FHIR

    One of the most widely used libraries for FHIR integration, HAPI FHIR is an open-source Java-based implementation of the FHIR standard. HAPI FHIR provides a comprehensive solution for handling FHIR resources and supports all versions of FHIR, including R2, R3, and R4.

    Key Features:

    • RESTful client and server support.
    • Extensive community documentation and support.
    • Tools for validation, profiling, and resource creation.
    • Ideal For: Java developers, startups, and large-scale enterprise healthcare solutions.

    Use Case:

    HAPI FHIR is often used by healthcare application developers who need a reliable, open-source solution to create, validate, and manipulate FHIR resources in Java environments.

    2. Firely .NET SDK

    Firely, the company behind the .NET SDK, is a significant contributor to the FHIR standard. This SDK is widely used by developers working in Microsoft’s .NET ecosystem. The library simplifies FHIR integration in .NET applications by offering tools for resource creation, validation, and FHIR server development.

    Key Features:

    • Support for all FHIR versions.
    • Built-in validation tools.
    • Simplified profile creation and resource validation.
    • Ideal For: Microsoft developers working on .NET-based healthcare solutions.

    Use Case:

    Firely .NET SDK is ideal for healthcare systems already built on .NET architecture. It allows developers to easily integrate FHIR resources and maintain interoperability with other systems.

    3. Java FHIR Client by IBM

    IBM provides a Java FHIR client that supports robust FHIR interactions for Java-based healthcare applications. The library allows developers to create, read, update, and delete FHIR resources while ensuring data security.

    Key Features:

    • Full FHIR resource support.
    • Integrated with IBM’s Watson Health.
    • Security features like OAuth and SSL encryption.
    • Ideal For: Enterprises looking to build secure and scalable FHIR-based healthcare applications.

    Use Case:

    IBM’s FHIR client is commonly used in large healthcare organizations that need highly scalable and secure data exchange systems.

    4. SMART on FHIR

    SMART on FHIR is a widely-used library that simplifies the development of healthcare applications that can connect to EHR systems. Built on top of FHIR, it provides security features like OAuth2 for authentication and enables the use of third-party apps in FHIR-based environments.

    Key Features:

    • OAuth2-based authentication.
    • Ready-to-use APIs for healthcare apps.
    • Integration with major EHR vendors.
    • Ideal For: Developers building healthcare apps that integrate with existing EHR systems.

    Use Case:

    SMART on FHIR is best suited for app developers who want to create third-party healthcare applications that can connect with existing FHIR-enabled EHR systems, such as Epic or Cerner.

    5. Google FHIR Protocol Buffers

    Google’s FHIR Protocol Buffers offer an innovative approach to FHIR data storage and transmission. Protocol Buffers, also known as protobufs, are a language-neutral, platform-neutral, extensible way of serializing structured data.

    Key Features:

    • Lightweight data interchange format.
    • Fast and efficient data processing.
    • Extensible for various use cases.
    • Ideal For: Organizations looking to optimize FHIR data storage and transmission.

    Use Case:

    Google FHIR Protocol Buffers are used by healthcare organizations that need efficient and scalable ways to manage and store FHIR data across different systems.

    6. Kodjin FHIR Server SDK

    Kodjin FHIR Server SDK provides an easy-to-use development environment for implementing FHIR-based solutions. The Kodjin FHIR Server offers high scalability, robust security features, and advanced customization, making it an excellent choice for healthcare organizations of all sizes.

    Key Features:

    • Scalable to accommodate growing data needs.
    • Highly customizable FHIR profiles.
    • Enhanced security features such as encryption and audit logging.
    • Ideal For: Organizations looking for a flexible and secure FHIR server with easy integration options.

    Use Case:

    Kodjin FHIR Server SDK is perfect for healthcare systems that require a custom FHIR server setup that can scale with the organization’s growth and evolving data management needs.

    7. Cerner FHIR Tools

    As one of the biggest EHR vendors globally, Cerner offers a suite of FHIR tools designed to integrate seamlessly with their EHR platform. This library supports FHIR integration and provides a set of APIs that allow developers to create applications leveraging FHIR data.

    Key Features:

    • Support for real-time patient data exchange.
    • Integration with Cerner’s population health and analytics tools.
    • Comprehensive API documentation.
    • Ideal For: Organizations using Cerner EHR systems.

    Use Case:

    Healthcare providers using Cerner EHR can leverage Cerner’s FHIR tools to enable interoperability with third-party apps and streamline patient data exchange.

    8. Mirth Connect

    Mirth Connect is a versatile healthcare data integration engine that supports FHIR, HL7, and other healthcare data standards. It provides a seamless interface to connect various healthcare systems and data sources.

    Key Features:

    • Support for multiple data standards.
    • Data transformation and mapping tools.
    • Scalable to fit large healthcare systems.
    • Ideal For: Healthcare providers needing complex integration capabilities.

    Use Case:

    Mirth Connect is widely used by healthcare organizations that need to integrate multiple data systems and ensure smooth communication between them.

    9. Redox Engine

    Redox is a popular healthcare integration platform that simplifies FHIR integration across various systems. It provides an easy-to-use API and a scalable infrastructure that allows healthcare providers to connect their applications with existing EHRs and healthcare data systems.

    Key Features:

    • Scalable infrastructure for data exchange.
    • Real-time integration with EHR systems.
    • API-first approach for easier development.
    • Ideal For: Healthcare organizations looking for rapid FHIR integration and scalability.

    Use Case:

    Redox Engine is commonly used by healthcare application developers who want a simple, scalable solution for integrating with multiple EHRs and ensuring real-time data exchange.

    10. Simplifier.NET

    Simplifier.NET is an online FHIR development environment that allows developers to create, validate, and share FHIR resources easily. It’s a popular tool for collaborative FHIR projects and provides essential tools for profile management, validation, and resource development.

    Key Features:

    • Online environment for FHIR resource creation.
    • FHIR profile validation.
    • Real-time collaboration tools for teams.
    • Ideal For: Teams working on collaborative FHIR projects.

    Use Case:

    Simplifier.NET is used by healthcare developers and teams working on FHIR projects where collaboration and easy resource sharing are critical.

    4. Factors to Consider When Choosing a FHIR Library

    When choosing a FHIR library for integration in healthcare systems, consider the following factors:

    • Compatibility: Ensure that the library supports the FHIR version you need.
    • Security: Look for libraries with built-in security features like encryption and authentication.
    • Ease of Use: Choose libraries with comprehensive documentation and community support.
    • Customization: Determine whether the library allows customization for your specific needs.
    • Scalability: Consider if the library can handle the growing data needs of your organization.

    5. Conclusion

    Choosing the right library for FHIR integration is critical to ensuring seamless healthcare data interoperability. The libraries mentioned in this article, from HAPI FHIR to Kodjin FHIR Server SDK, provide a range of options for developers and healthcare organizations, depending on their unique needs.

    Whether you’re building a small healthcare app or integrating complex EHR systems, these tools offer the features and scalability needed to create a FHIR-compliant environment. With FHIR becoming the global standard for healthcare data exchange, staying updated on the best libraries and tools will give your organization a significant advantage in providing quality patient care.

    FAQs

    1. Which is the best open-source library for FHIR integration?
      • HAPI FHIR is one of the best open-source libraries, offering comprehensive support for Java-based FHIR implementations.
    2. Can the Kodjin FHIR Server SDK handle large-scale healthcare data?
      • Yes, the Kodjin FHIR Server SDK is designed to handle large volumes of data and scale with the organization’s needs.
    3. Is Firely .NET SDK suitable for enterprise healthcare applications?
      • Yes, the Firely .NET SDK is well-suited for enterprise-level applications, especially those built on the Microsoft .NET ecosystem.
    4. Which FHIR library is best for real-time patient data exchange?
      • Redox Engine and Cerner FHIR Tools are both excellent for real-time patient data exchange, depending on your EHR setup.
    5. What factors should I consider when selecting a FHIR library?
      • Key factors include compatibility with your tech stack, security features, ease of use, customization options, and scalability.

    References

    1. Health Level Seven International (HL7). “FHIR Overview and Implementation.” Available at: https://www.hl7.org/fhir/overview.html
    2. Google Cloud Healthcare API. “Integrating FHIR for Scalable Healthcare Data Solutions.” Available at: https://cloud.google.com/healthcare
    3. IBM Developer. “FHIR Server Implementation on IBM Cloud.” Available at: https://developer.ibm.com/technologies/healthcare/
    4. Microsoft Azure. “Azure API for FHIR: Managed Health Data Platform.” Available at: https://azure.microsoft.com/en-us/services/healthcare-apis/
    5. SMART Health IT. “SMART on FHIR: An Interoperability Framework.” Available at: https://smarthealthit.org/
    6. Cerner Corporation. “Cerner’s Integration with FHIR Standards.” Available at: https://www.cerner.com/solutions/interoperability
    7. Epic Systems Corporation. “FHIR Integration for Electronic Health Records.” Available at: https://www.epic.com/
    8. Mayo Clinic Platform. “Mayo Clinic’s Use of FHIR for Interoperable Healthcare Solutions.” Available at: https://www.mayoclinic.org/
  • Top 10 Tools for Working with FHIR in 2024

    Top 10 Tools for Working with FHIR in 2024

    The Fast Healthcare Interoperability Resources (FHIR) standard has revolutionized healthcare data exchange, providing the framework for better interoperability among electronic health systems. As more healthcare organizations worldwide adopt FHIR, choosing the right tools to work with this standard becomes increasingly important. Whether you’re building an app, developing EHR systems, or creating telehealth solutions, having the best tools ensures efficient implementation, scalability, and security.

    This article will delve into the Top 10 Tools for Working with FHIR in 2024.

    1. Kodjin FHIR Server

    The Kodjin FHIR Server is a robust solution designed to streamline FHIR implementation for healthcare organizations of any size. It stands out for its scalability, security, and customization capabilities, making it a preferred choice for organizations looking to implement or expand their FHIR-based solutions.

    Key Features:

    • Scalability: Kodjin FHIR Server can handle large amounts of healthcare data, ensuring smooth data exchange even in high-traffic environments.
    • Customization: It allows easy customization of FHIR profiles to meet the unique needs of different healthcare organizations, making it ideal for specialized healthcare settings.
    • Security: Kodjin FHIR Server is designed with advanced security features like encryption, access control, and audit trails, ensuring compliance with healthcare regulations like HIPAA.

    With both cloud-based and on-premise deployment options, Kodjin is highly flexible, making it an ideal solution for healthcare providers who need a cost-effective, scalable, and secure FHIR server. Its developer-friendly approach, combined with robust security features, positions Kodjin as a competitive option for organizations looking to enhance their data interoperability.

    1. Microsoft Azure API for FHIR

    Microsoft’s Azure API for FHIR offers a fully managed, secure, and scalable environment for healthcare organizations to store, manage, and exchange FHIR data. This cloud-based solution integrates well with Microsoft’s ecosystem, enabling healthcare providers to leverage services like AI, machine learning, and analytics.

    Key Features:

    • Compliance Ready: Ensures compliance with HIPAA, GDPR, and other regulatory requirements.
    • Global Scalability: Azure’s global infrastructure ensures data availability and fault tolerance.
    • Integration: Seamlessly integrates with Azure AI and data analytics tools for enhanced data insights.

    Healthcare organizations, particularly large hospitals and networks, benefit from Azure API for FHIR’s scalability and built-in security features. By leveraging Azure’s ecosystem, organizations can unlock the potential of predictive analytics and improve patient care.

    1. HAPI FHIR

    HAPI FHIR is one of the most widely used open-source frameworks for working with FHIR, especially in the developer community. Built on Java, this tool provides comprehensive support for all FHIR versions, from DSTU2 to R4B and R5. With its robust client and server libraries, HAPI FHIR allows developers to build, validate, and deploy FHIR-based solutions with ease.

    Key Features:

    • RESTful API: The framework supports RESTful FHIR APIs, allowing developers to interact with FHIR resources using standard HTTP requests.
    • Custom Profiles: HAPI FHIR allows users to create custom profiles to meet unique requirements.
    • Community-Driven: Backed by an active community, HAPI FHIR provides extensive documentation, tutorials, and community support.

    HAPI FHIR is ideal for developers building custom healthcare applications or startups that need a reliable, open-source solution without the complexity of proprietary platforms.

    1. Google Cloud Healthcare API

    Google Cloud’s Healthcare API is another top tool for FHIR implementation. Designed to manage large volumes of healthcare data, this platform enables healthcare providers to store, manage, and share FHIR-compliant data efficiently. One of the key advantages of this API is its tight integration with Google’s machine learning and AI services, allowing organizations to gain actionable insights from their health data.

    Key Features:

    • Multi-Standard Support: Apart from FHIR, Google Cloud Healthcare API also supports HL7 and DICOM.
    • AI Integration: Integration with Google’s AI services allows organizations to apply machine learning models to healthcare data.
    • Data Analytics: The platform offers advanced analytics to enable healthcare providers to make data-driven decisions.

    For organizations focused on analytics and machine learning, Google Cloud Healthcare API is an ideal platform. Its capability to handle multiple healthcare standards, combined with powerful AI tools, makes it an essential tool for healthcare providers looking to innovate.

    5. Firely Server (formerly Vonk)

    Firely Server is a highly customizable FHIR server solution from Firely, a company renowned for its contributions to the FHIR standard. Firely provides several tools for working with FHIR, including the Firely SDK and Simplifier.net, an online collaboration platform for FHIR resources.

    Key Features:

    • Full FHIR Support: Firely Server supports all FHIR resource types and versions.
    • Customization: Users can create, validate, and test custom FHIR profiles.
    • Validation Tools: Built-in validation ensures that all FHIR resources conform to the FHIR specification.

    Firely is an excellent option for developers who need flexibility in working with FHIR profiles and validation tools, making it popular among large healthcare institutions and independent developers alike.

    6. InterSystems IRIS for Health

    InterSystems IRIS for Health is an enterprise-grade platform that provides comprehensive support for FHIR and other healthcare interoperability standards. It is widely used by large healthcare organizations for data integration, analytics, and advanced workflows.

    Key Features:

    • Data Model: InterSystems IRIS offers a multi-model data platform that supports relational, document, and object data models.
    • Interoperability: Supports multiple healthcare standards including HL7, CDA, and FHIR.
    • Enterprise-Grade: Designed to handle complex workflows, it offers extensive tools for large-scale healthcare data management.

    With a strong focus on scalability and enterprise integration, InterSystems IRIS for Health is well-suited for large healthcare systems, offering robust solutions for data exchange, analytics, and machine learning.

    7. Redox

    Redox is a popular healthcare integration platform that simplifies the process of connecting healthcare applications with FHIR-compliant systems. Known for its API-first approach, Redox handles the complexity of healthcare data standards, offering tools to integrate FHIR, HL7, and other standards into existing systems.

    Key Features:

    • Pre-built Connectors: Redox provides pre-built connectors for popular healthcare systems, reducing development time.
    • Real-time Data Exchange: Ensures real-time interoperability between different healthcare applications.
    • Scalability: Redox is designed to scale with growing healthcare organizations.

    Redox is ideal for healthcare organizations needing to streamline data exchange across various systems, providing a fast and scalable way to integrate FHIR into existing workflows.

    8. Cerner FHIR Tools

    As one of the largest EHR providers in the world, Cerner has developed a suite of FHIR tools designed to integrate seamlessly with its EHR platform. These tools enable developers to build and integrate applications that leverage real-time healthcare data.

    Key Features:

    • Real-time Data Exchange: Cerner FHIR tools allow for the seamless exchange of patient data in real-time.
    • Population Health: Support for population health management and analytics.
    • Developer SDKs: Offers developer SDKs to simplify application development.

    For organizations using Cerner EHR, these FHIR tools are essential for ensuring that their systems are fully interoperable with other healthcare applications, improving patient outcomes and operational efficiency.

    9. Mirth Connect

    Mirth Connect is an open-source integration engine widely used in the healthcare industry. It supports multiple data exchange standards, including FHIR, HL7, and DICOM, making it a versatile tool for connecting disparate healthcare systems.

    Key Features:

    • Data Transformation: Mirth Connect allows users to transform and map data between different standards, ensuring compatibility across systems.
    • Open Source: Free and highly customizable, making it ideal for developers.
    • Extensive Support: Backed by a strong community and extensive documentation.

    Mirth Connect is a highly customizable tool that is popular among developers and healthcare IT teams needing an affordable, flexible solution for data integration and transformation.

    10. Simplifier.net

    Simplifier.net is an online platform designed to simplify FHIR development. It provides tools for creating, editing, and validating FHIR resources, making it easier for developers to work with FHIR standards.

    Key Features:

    • FHIR Resource Editor: Simplifier.net allows users to create and edit FHIR resources in a user-friendly, cloud-based environment.
    • Validation Tools: Built-in validation tools ensure that FHIR resources are compliant with the latest standards.
    • Collaboration: Simplifier.net allows teams to collaborate on FHIR projects in real-time.

    For small teams and independent developers, Simplifier.net is an excellent tool for working with FHIR resources, ensuring that projects remain compliant with evolving FHIR standards.

    ToolKey FeaturesIdeal For
    Kodjin FHIR ServerScalable, customizable, and secureSmall to large healthcare organizations
    HAPI FHIROpen-source, comprehensive FHIR supportDevelopers, startups
    Microsoft Azure API for FHIRCloud-based, HIPAA compliant, scalableLarge healthcare organizations
    Google Cloud Healthcare APIAI and machine learning integrationOrganizations focused on analytics
    Firely ServerCustomizable profiles, validation toolsHealthcare institutions, developers
    InterSystems IRIS for HealthEnterprise-grade, multi-model data platformLarge healthcare organizations
    RedoxPre-built connectors, real-time data exchangeIntegrating healthcare apps and systems
    Cerner FHIR ToolsSeamless integration with Cerner EHR systemsCerner-based healthcare systems
    Mirth ConnectOpen-source, supports multiple standardsCustomizable integration solutions
    Simplifier.netFHIR resource editor, real-time collaborationSmall teams, developers

    Conclusion

    The future of healthcare data exchange lies in the adoption of the FHIR standard, and choosing the right tools can significantly impact the success of FHIR implementation. The Kodjin FHIR Server stands out for its flexibility, scalability, and security, offering a reliable solution for healthcare organizations aiming for seamless interoperability.

    Each of the tools listed above provides unique benefits based on an organization’s specific needs. From open-source frameworks like HAPI FHIR to enterprise-grade solutions like InterSystems IRIS for Health, healthcare providers have a wide range of options to choose from. Selecting the best tool will not only improve operational efficiency but also ensure that healthcare providers remain compliant with evolving regulations and standards.

    FAQs

    1. What is the best tool for small healthcare organizations implementing FHIR?

    Kodjin FHIR Server is highly recommended for small to mid-sized healthcare organizations due to its scalability, cost-effectiveness, and customization options.

    1. Which FHIR tool is best for AI-driven healthcare applications?

    Google Cloud Healthcare API is ideal for organizations that want to leverage machine learning and AI for healthcare analytics.

    1. Can the Kodjin FHIR Server handle large-scale healthcare data?

    Yes, the Kodjin FHIR Server is designed to scale and handle large volumes of healthcare data, making it suitable for both small and enterprise-level organizations.

    1. What are the key security features of Kodjin FHIR Server?

    Kodjin FHIR Server offers advanced security features such as encryption, access control, and audit logging, ensuring compliance with HIPAA and other regulations.

    1. Which FHIR tool offers the most flexibility in customization?

    Firely Server and Kodjin FHIR Server are both highly customizable, allowing organizations to adapt FHIR profiles to their specific needs.

    References

    1. Health Level Seven International (HL7). “FHIR Overview and Documentation.” Available at: https://www.hl7.org/fhir/
    2. Microsoft Azure API for FHIR. “A Comprehensive Managed Service for FHIR on Azure.” Available at: https://azure.microsoft.com/en-us/services/healthcare-apis/
    3. Google Cloud Healthcare API. “FHIR for Scalable Healthcare Data Management.” Available at: https://cloud.google.com/healthcare
    4. IBM FHIR Server. “FHIR Server Implementation and Customization on IBM Cloud.” Available at: https://developer.ibm.com/articles/fhir-server-on-ibm-cloud/
    5. FHIRbase. “Open-Source FHIR Database Implementation.” Available at: https://fhirbase.github.io/
    6. HAPI FHIR. “Java Library for FHIR Implementation.” Available at: https://hapifhir.io/
    7. PostgreSQL FHIR Integration. “Using PostgreSQL for Storing FHIR Data.” Available at: https://www.postgresql.org/
    8. SMART Health IT. “SMART on FHIR: Enabling Interoperable Health Apps.” Available at: https://smarthealthit.org/
    9. Cerner Ignite APIs for FHIR. “FHIR APIs for Cerner’s Healthcare Solutions.” Available at: https://www.cerner.com/solutions/interoperability
    10. Kodjin FHIR Server. “Kodjin FHIR Server: Scalable FHIR Solution for Healthcare Applications.” Available at: https://kodjin.com/fhir-server
  • Decentralized identity startup Spruce wants to help users control their sign-in data

    Decentralized identity startup Spruce wants to help users control their sign-in data

    Decentralized identity startup Spruce is on a mission to help users control their sign-in data.

    The company has developed a platform that allows users to securely log in to websites and apps without sharing their personal data with the service providers.

    Instead, the user’s data is stored on a secure, decentralized network that is controlled by the user.

    This means that users can control who has access to their data and how it is used.

    Spruce is currently working on integrating its platform with major web browsers and plans to launch a beta version in early 2019.

    How does Spruce work?

    Spruce’s platform works by allowing users to log in to websites and apps with a Spruce account.

    When a user logs in with their Spruce account, they are given a unique ID that is used to identify them on the decentralized network.

    The user’s data is then stored on the decentralized network, which is controlled by the user.

    This means that the user has complete control over who has access to their data and how it is used.

    What are the benefits of using Spruce?

    There are many benefits of using Spruce, including:

    1. Users have complete control over their data.

    2. Users can login to websites and apps without sharing their personal data.

    3. The platform is secure and decentralized.

    4. The platform is easy to use.

    5. Spruce is free to use.

    How do I get started with Spruce?

    To get started with Spruce, simply sign up for an account at https://spruce.sh/. Once you have an account, you can begin using the platform to log in to websites and apps or store data securely on the decentralized network.

    What is a decentralized startup?

    A decentralized startup is a company that is structured around a decentralized network rather than a centralized authority. Decentralized startups are often built on blockchain technology and aim to provide more secure and transparent solutions to traditional problems.

    There are many more decentralized startups emerging every day, as the technology continues to evolve. These companies are rethinking traditional business models and paving the way for a more open and transparent future.

    Why is it crucial to control sign-in data?

    As our lives move increasingly online, our personal data is becoming more and more valuable. Hackers are able to exploit this data for financial gain or to simply cause chaos. Thus, it’s becoming increasingly important for companies to protect our data.

    One way to do this is by controlling sign-in data. By requiring users to authenticate their identity before accessing sensitive information, companies can make it much harder for hackers to gain access. This added layer of security can help protect our data from being compromised.

    What is two-factor authentication?

    You can add an additional degree of security to your account protection by using two-factor authentication (2FA). You will be required to input an extra code when signing in if 2FA is enabled. Typically, an app on your phone, like Google Authenticator, generates this code.

    2FA adds an extra step to the login process, making it more difficult for hackers to gain access to your account. Even if they have your username and password, they will not be able to log in unless they also have your 2FA code.

    How can I set up two-factor authentication?

    Most online services that offer 2FA will give you instructions on how to set it up. Usually, you will need to download a 2FA app, such as Google Authenticator, and then add your account to the app. Once you have done this, you will be given a code that you will need to enter every time you log in.

    What are the benefits of two-factor authentication?

    2FA provides an extra layer of security for your online accounts. Even if someone manages to steal your username and password, they will not be able to log in unless they also have your 2FA code. This makes it much more difficult for hackers to gain access to your account and helps to protect your data.

    Are there any downsides to using two-factor authentication?

    The main downside of using 2FA is that it can be slightly inconvenient. Every time you want to log in, you will need to open your 2FA app and enter the code. This can add an extra step to the login process and may be frustrating if you just want to quickly log in and check something.

    Conclusion

    Sign-up data is collected when the user enters into an agreement with a site or service to create an account. The data collected may include the username, email address, and password chosen by the user. In some cases, additional information such as addresses, phone numbers, and credit card numbers are also collected.

    The purpose of collecting sign-up data is to allow the site or service to identify the user and verify that they are who they say they are. This data is also used to contact the user if there are any issues with their account or if their account is compromised.

    There are a few risks associated with sign-up data. The most significant risk is that this data can be leaked in a data breach. If sign-up data is leaked, it can be used to steal the user’s identity or to access their account on the site or service.

    To protect sign-up data, it is important to use a strong password and to never reuse passwords across different sites and services. Additionally, two-factor authentication (2FA) can be used to add an extra layer of security to accounts.

  • Introduction to website navigation design

    Introduction to website navigation design

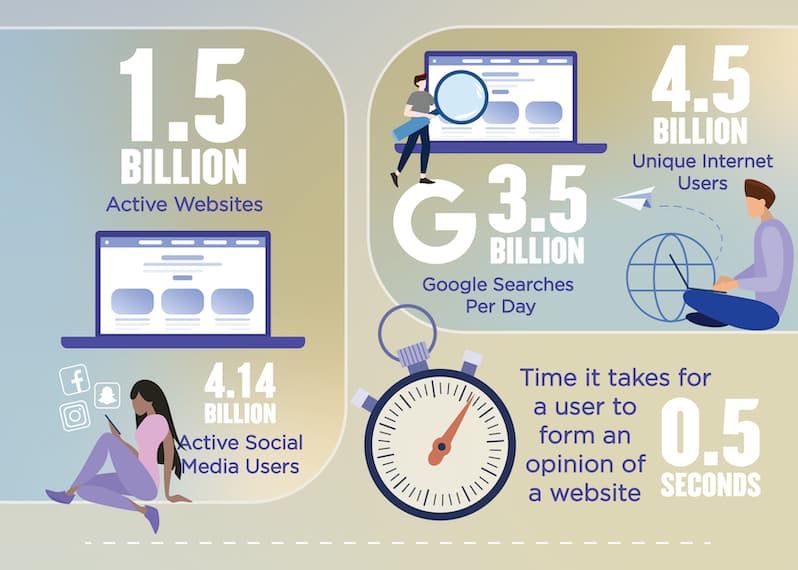
    Outstanding design is the thing that the user could never notice, but when it is absent, your business might get into trouble. The number of websites already exceeded the 2 billion mark, and for you, it means high competition. It doesn’t matter in what industry are you in Agriculture, Manufacturing, Retail, or Healthcare. Without a shadow of a doubt, market leaders will have great online representation in any industry, so you need to keep up in order to get all of your potential profits.

    An internet user in the United States of America visits over 130 websites per day on average and spends less than 50 milliseconds to form an opinion. How to make sure that it will be your pages and their opinion will be good? While the visits are in the hands of your marketing and SEO experts, you can make a great impression on users by boosting your design efforts.

    Website navigation design is a part of the website redesign strategy, and navigation is all about the journey of the user through your pages. We will share our experience and expertise to offer you a wide perspective on this subject.

    “Design creates culture. Culture shapes values. Values determine the future.”

    — Robert L. Peters

    Essential types of navigation

    So, navigation means the way your users will locate the necessary information via the navigation menus. It may include the following types:

    • meta navigation (everything placed on the top part of your page)
    • primary navigation (elements located below meta navigation)
    • secondary and tertiary navigation (elements like drop-down menus, horizontal listing, or sidebar)
    • footer navigation (everything placed at the very bottom of a page)

    In most cases, you will use almost all types of website navigation, in one way or another, to achieve your results. 

    The importance of having fine-tuned website navigation structures

    The benefits of a great design are many, and, most importantly, the design adds to the credibility of your entire business. There are multiple key elements to an outstanding website navigation design, and they include 

    • overall consistency
    • clear and defined hierarchy between all website navigation bars
    • mental model of the users
    • simplicity of comprehension
    • common elements and patterns of the user interface
    • experience without friction

    The most popular website navigation menu types

    While we will discuss multiple elements of navigation structure of a website below, keep in mind that in a real-world product it is always a combination of different elements that make it all work. 

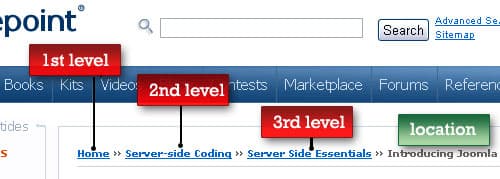
    Breadcrumbs

    This is considered to be a secondary navigation system that shows a location of a user. Breadcrumbs are the favorite choice for e-commerce websites because they allow deep hierarchical subcategorization. Here is an example:

    The Hamburger menu

    While being more popular on mobile apps, the hamburger menu is still among the most popular website navigation bar designs among available options. This menu looks like three bars that resemble a hamburger. When you click or tap on them, other options for destinations pop up and users can move to other places. The primary purpose of their usage is to save space, however, multiple studies showed that they are not as effective as they are perceived to be, due to their lack of discoverability. Here is how the hamburger menu might look:

    Tabs

    This type also has more implementation cases in the mobile realm. This navigation type is built to save vertical space. The information is displayed across tabs here, and the tabs are usually on the top or the bottom of the screen. Here is an example: 

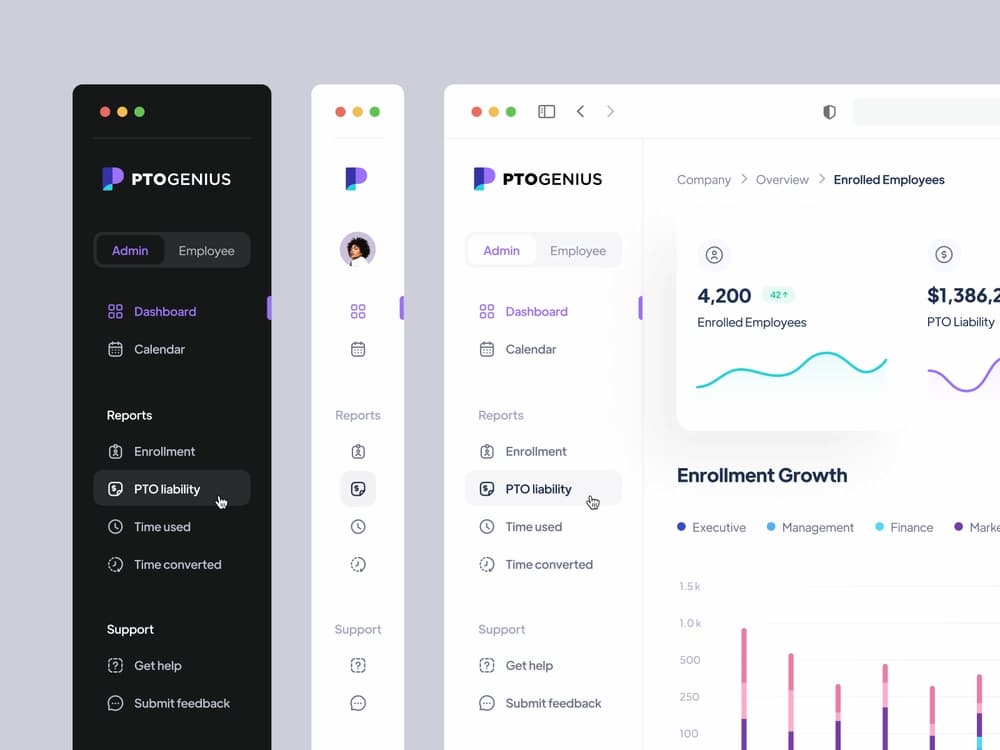
    Vertical navigation

    Typically placed on the left side, vertical menus take a big part of a screen and include links with multiple levels of website navigation. It is a great way to add up an enormous amount of options using a reasonable amount of space. Here is an example of vertical navigation: 

    CTA buttons

    Finally, we should mention one of the website menu types that can make all the difference in your business results. An accurately placed CTA (Call-to-action) button can drive your revenues by getting more customers. Here is an example of the design: 

    Website navigation best practices in 2022

    Best practices for navigation design
    Keep everything clearEnsure that all labels are appropriate for their respective locations
    Make your labels descriptivePlace as much information as you can in your labels to get UX and SEO benefits
    Align navigation design with user goalsKeep in mind the interests of your focus groups while designing your pages
    Don’t ignore navigation cuesThis element could be very important to add up to the user experience
    Have prototyping and testing phasesMake sure that you decided on the best navigation design and everything works just as planned
    Ensure mobile responsivenessYour website must work perfectly on screens of any size for you to get maximum revenues
    Check all key navigation elementsAvoid common mistakes while placing your key navigation elements

    With types of menus on websites out of our way, we can focus on some tips and best practices that will allow you to get more bang for your buck. What can make your top navigation bars, footers, or any other design elements more effective compared to your competition? These insights will help you figure it out!

    Keep everything clear

    You should make everything understandable and clear, and don’t make the user waste any second trying to understand what you meant in a particular part of the website. All labels must suit the directions that they are leading. If you make the experience confusing for the users, you will end up losing potential clients.  

    Another important issue that should be addressed is keeping consistency across the entire design of your website. It will add up to the ease of comprehension for the visitors during their journey. 

    You can leverage your creativity and invent something that hasn’t been done before, and try to stand out with your idea. However, in the website navigation design area it is an exception to the rule, and more often than not, keeping navigation simple will be key to your success.

    Make your labels descriptive

    Top-level navigation categories are a great place to inform your users what your website is all about and leverage SEO as well. If your business provides some kind of service, make sure to describe what those services are, mentioning as much detail as makes sense. The more informative your categories will be, the more intuitive experience your users will get. 

    Align navigation design with user goals

    First, you need to come up with the target groups with your marketing department. What are the focus groups of users that you are aiming for? What are the goals for them to visit your pages, and what value they can get? After figuring out what your target users might be interested in, try to design your navigation according to these suggestions. Your target users must be able to locate necessary pages in the shortest amount of time, see that your business is trustworthy, and be able to contact support services when needed. 

    You can come up with different navigation scenarios for different focus groups and select the middle ground between them in your final navigation structure. 

    Don’t ignore navigation cues

    The navigation cues are helping users to understand where are they located at the moment. This element is also very helpful in creating a consistent navigation design that will become a delightful experience for your users. 

    Have prototyping and testing phases

    If you don’t skip a prototyping phase, you will be able to see which navigation designs work better than the others and will be able to make all necessary adjustments before the release of the final product. As for testing, having this phase in your process will help you save money in the long run. Such testing tools as Optimal Flow and HotJar will be very helpful in achieving flawless functionality. 

    Ensure mobile responsiveness

    Today, if your website doesn’t work properly on mobile devices, you are at risk of losing your business altogether. With a custom software development partner, you can cover this area before the development process even starts. However, if you choose a website builder instead of hiring a team of professionals, make sure that the platform supports mobile functionality as much as possible. 

    Check all key navigation elements

    The final tip for today will be to check that all navigation elements are in place. The most common mistakes include:

    • Not make hyperlinks obvious and don’t highlight them with a color that will stand out
    • Not striking a balance of adding elements to your header
    • Not keeping sidebars separate
    • Forgetting about footer links, and failing to get the most out of your navigation design

    FAQ

    What is navigation in website design?

    This is the journey that users take while visiting your website. A good user experience in this area is achieved by the proper placement of multiple elements of your pages and ensuring the logical transitions between them. More often than not, the users won’t even notice the well-crafted design of the journey. However, when it is messed up, it could be a big challenge for your business in getting revenue from your website. 

    How to plan website navigation?

    It combines multiple elements and has different approaches to do it right. Every case is unique, so there is a one-size-fits-all recipe. It will be a good idea to contact a software development company with proven experience to help you, at least with consultation services if you have the necessary design and tech skills.